Wednesday, November 5, 2014

How I Save A Ton of Money on Shoes


Every girl loves a new pair of shoes.   I'm like every girl, except I don't like spending money on them.    So there are a couple of tricks I have used to save a ton of money on shoes.

1.  I look at thrift stores and yard sales.
I know, I know.  The sound of used shoes doesn't sound appealing, but not all thrift store shoes have been used.  There are a lot of people out there who buy shoes and never wear them.  I usually get pretty lucky finding new or gently used shoes at yard sales and thrift stores and for under $5 each.

2.  I shop discount stores.  I love Ross, Marshalls, Tj max, etc.  There you can find shoes that are significantly discounted from department stores.  Most shoes I find for under $20.  The only exceptions I make are boots and Converse (which I will spend $25 for).

3.  I look for items that need some work.
I am the queen of freezer stretching.  If a pair of shoes are a close fit and I know within a couple of wears they will be nice and comfy, I freezer stretch.

I also look for shoes that are slightly too big that I can add  heel grippers to.  I get these at the Dollar Tree.  Since I have a slightly wider foot, it makes for a nice comfortable fit around the toes.
I try to think of why things are on clearance.  Maybe there are scuff marks that can be easily removed or the dye needs a little touch up, which you can easily do with colored sharpies.

This pair of shoes had little chains on the back, which made for a cute accent, but was really annoying when you walked.  A couple of dabs of hot glue and they are nice and glued on and don't bother me anymore.

4.  I keep it to the basics.  Yes, I love shoes like everyone else, but I don't need a ton of shoes.  I keep a pair of black and brown heels, boots, sandals, and flats.  All the other shoes I have are either gifts or I got for extremely cheap (like in the under $5 bracket).

What ways do you save on shoes?

-mONICa

Wednesday, October 29, 2014

Anthropologie Knock Off Outfit

So if you haven't noticed I've changed the name of the blog to Simply Thrifting.  It was a long time debate, but as I don't live in a house anymore decorating projects haven't been as easy to come by.  I'm on a quest to live a simpler life one of my best budget savers is buying almost everything at thrift stores and yard sales.  I also love fashion, bet you guys didn't know that.  So I've decided to incorporate some of my fashion into the blog.  You'll get a little bit of everything, from household stuff, to fashion, to furniture.  I promise I won't let you down.

Now for todays outfit.  If you don't already know this I love Anthropologie...I just don't love the prices.  I was lucky enough to get both of these items as hand me down from friends.  The shirt appeared in issue 7 of the 2011 Anthropologie catalog.  Now the skirt isn't authentic, its a hand me down from another friend and it was a little too big for me.  Easy fix...I just zipped down the side with the sewing machine and I got the skirt that I was looking for.

Anthropologie denim shirt
I posted this pic on instagram a month or two ago, but since then its been my go too fall outfit.  It would probably even work on boots.  If you get a change click over and follow me on Instagram @simplythriftingblog.

Best,

mONICa

Tuesday, August 12, 2014

Guest Post: Dining Room Makeover- Olivia from DIY Mother

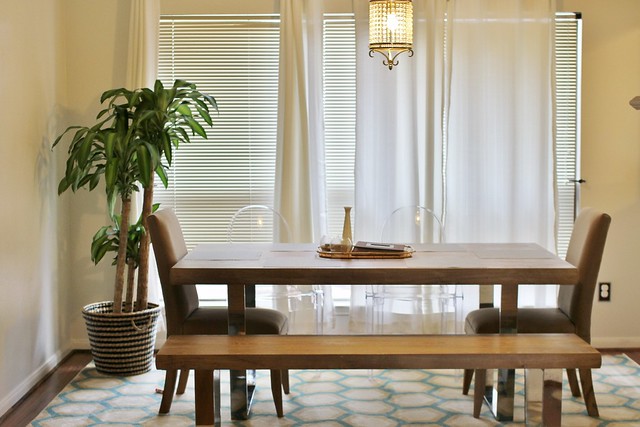
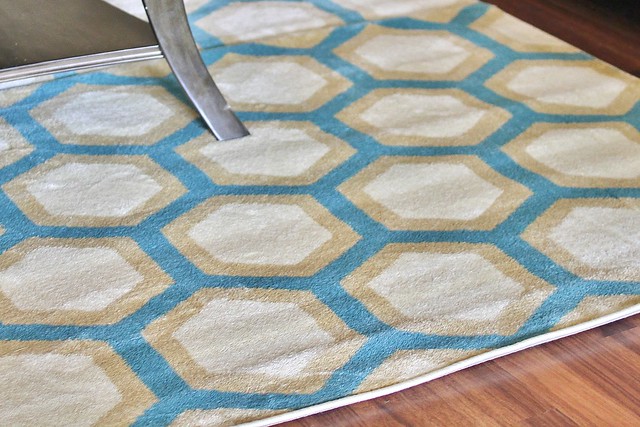
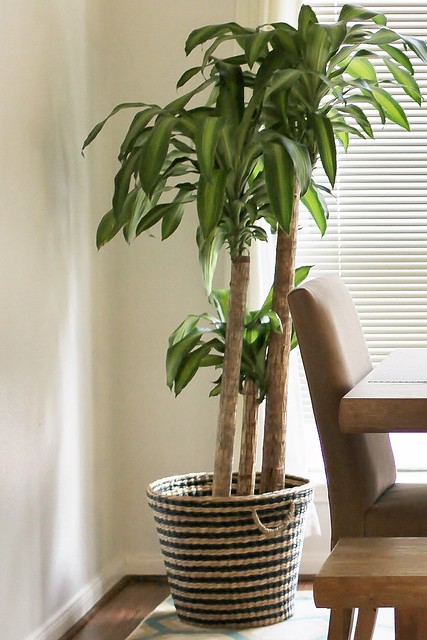
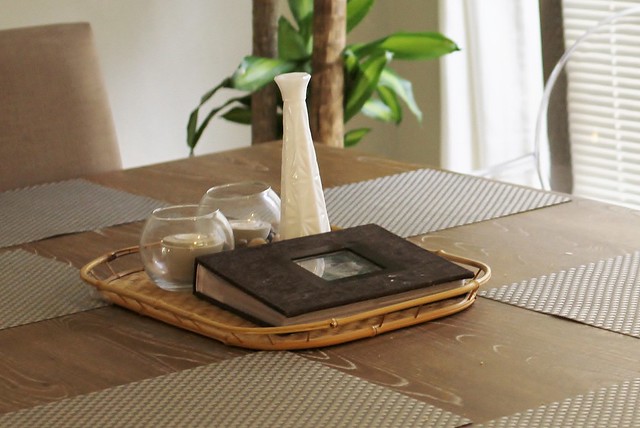
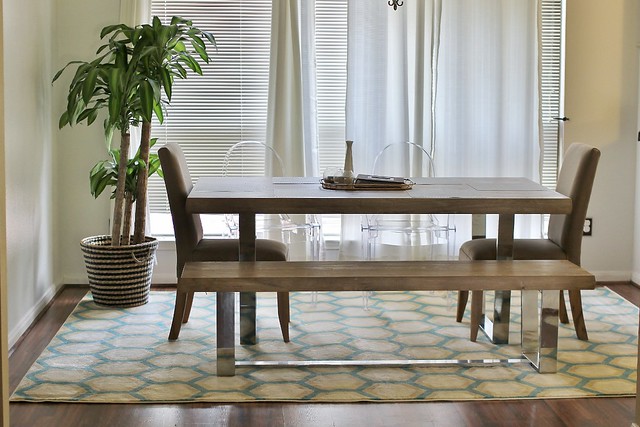
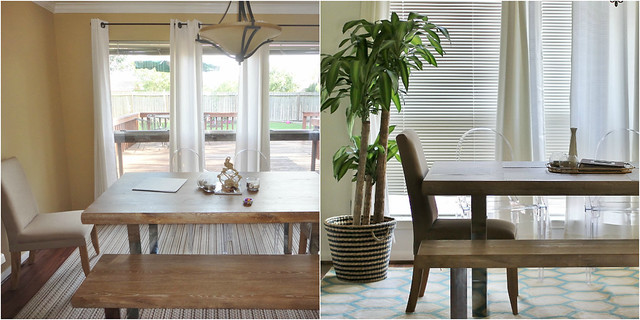
Today I'm pleased to share Olivia from DIY mother's Dining Room Makeover. Looks so comfortable and homey. Fire Away Olivia! Hi everyone! I’m Olivia from DIY Mother and I’m so happy that Monica has allowed me to share a room makeover I did recently. While my entire house really needs to be made over, I chose my dining room because it's one of the smaller rooms in my already small house. We bought the 3-bedroom, 2-bathroom house last December and since I have a toddler and a 7-month-old, it's been hard to focus my attention on decorating. We painted, added a new light fixture, and threw in some other small touches. For a budget makeover, I'm extremely happy with the finished product. Sometimes, you can re-decorate using things you already have and it looks brand new. I love that about decorating. OK, enough talking...you're probably ready to see the pictures now. If you want to see any of my home decor DIY projects, check out DIY Mother! I'm always up to something. I'm by no means an interior designer or decorator, but I have a real passion for design so I'm constantly trying new things. Here's how the dining room looked originally: bitmap I didn't like the light fixture, it fit more with the original rustic style of the house when we moved in. We switched out the fixture for something more chic and painted the walls a light grey-white. It really opened the space it, but it still needed a little color. And here's how it looks now: IMG_4550 (1280x853) Here's what I did: I brought a colorful, modern rug that was originally in the living room. I bought it a couple of weeks ago for a little over $100 and love how it looks. IMG_4152 I had a house plant sitting outside for a while, so I brought it in and put it in this basket from Ikea that was originally used to store toys on our fireplace. I love moving things around in our house, and I LOVE that basket. Under 20 bucks but nice and big and modern. IMG_4559 (853x1280) I also took a trip to Goodwill and found this light-colored wood tray and white single-flower vase. I can't decide whether I want to keep it on the dining room table or move it into the living room. IMG_4557 (1280x855) dining after I'm so happy with how it all turned out. I want to eventually change out the curtains with something more colorful, but I have to save that for later. PicMonkey Collage

Tuesday, July 29, 2014

Seating For 6 in A Small Kitchen Nook

Not too long ago I turned our Dining Room/ Area into a Music Room/ Office/ Guest Room/ Mud Room so that left no room for a dining table.  What is a family of 6 supposed to do when we want to eat?  I tossed around the idea of tv trays or a folding table, but didn't like that it was too casual. Someone was bound to turn the TV on and there would be no conversation.  I don't like that!

I had already built a tiny table using 1 x 8 boards and Ikea legs for the kids to eat in the kitchen.  I really wanted benches, but my nook has 2 uneven sides since there is a doorway on one side.  I thought about building in a banquette, but one side has a cabinet that I need to get access to.  Well, building my own benches was the answer.  I found this super simple bench on Ana White and decided to go for it, tweaking the dimensions so I could have custom sizes.  

ana white super simple bench

Then I expanded on the existing table by adding 3 more 1 x 8 boards.  Now the trick to this table was that I attached it to the wall using shelf brackets.   It made it much more solid.   I moved around the legs a bit on the original table for better support.

Here's the final product.

Dining table with Ikea Legs
 I painted the chairs the same color as the bench using a custom chalk paint I mixed up at the last minute.  I was too cheap and lazy to go to the paint store.  The vinyl on the seats used to be black, but I spray painted them white using plastic spray paint.  (Seems to be holding up well.)

bentwood chairs

Aqua Homemade Chalk Paint


Wall Mounted Kitchen Table

Now I'm able to put the 6 year olds on the small bench, my husband and I on the larger bench, and the teenage boys on the chairs.

If we have a dinner party I just pull out a folding table with and put a bunch of chairs around it in the living room or dining room.  Works like a charm.


mONICa

Wednesday, July 9, 2014

Kids Art Center for Under $35 Bucks

Last weekend since it was an extended weekend I ventured off into a bunch of projects.  One of the projects was to create an art area for my kids since they love to color.  I had stools that I took out of my kitchen to extend my nook area (post coming in a week or so), so I thought I would make good use of of them.

All I did was basically mount a long shelf.  I had a 1 x 12 cut to size (around 50") and stained it in a dark ebony color to match the other furnishings.  Then I used 3 Ikea Shelf Brackets at $2.00 each.  


I then added a couple of Ikea Rails.  This allowed me to attach a basket to put pencil cup holders in.  


I used laundry twine from the Dollar Tree and nailed 3 rows on top of the desk for the kids to hang their finished art projects.  Some Clothes Pins to secure their art and it was a wrap.


Super easy and fun project and the kids love it!!  If you need stools there are always the ones Target and Walmart sell for around $12.00 each, or you could also mount the desk at chair height.


xoxo,

Monica

Tuesday, July 8, 2014

21 Day Fix

So by now I'm sure you have all seem the infomercial for the 21 day fix.  I always watch those informercials and never order anything thinking that they are all gimmicks or too good to be true and some are.  Plus, have I told you all I'm allergic to exercise.  Haha!  At least that is what I tell myself.

Well,  a few months ago my good friend of mine tried the 21 day fix and wow!  Her results were awesome.  Totally inspiring!  Ever since I moved back to California I started gaining weight, stress weight and it wouldn't come off.  I tried every diet in the book and nothing worked.  Well,  my friend convinced me to try the 21 day fix.  The way she convinced me was by telling me there was a 30 day money back guarantee.  I thought to myself, if it doesn't work I've got nothing to lose and ordered it.

I am so happy I did.  My results are incredible.  I've done 2 rounds and feel amazing.  I also drink Shakeology daily to get my daily dose of dense nutrition.  Its loaded with super foods.  It can also act as a meal replacement.  In total I lost 8.4 pounds and 10 inches. Read more about my joinery at my Fitness Blog.

Anyway,  I'm so proud of myself I had to show you my results.


This was just in 21 days.  I haven't had the chance to take anymore pics since.  The eating plan is pretty simple, you have these containers and you fill up with a list of approved foods and you are never hungry.  The workouts are only 30 minutes a day.  They have a modifier if you are new to working out, but these exercises are not aggressively hard, they are doable.

Anyway,  I had to share.  If you are interested in getting the 21 day fix Challenge pack which gives you a nice discount on your first month of Shakeology click here.


Monday, July 7, 2014

DIY Piano Stand

Since I went back to work full time its been challenging to get projects done around the house.  I've resorted to buying Ikea stuff as disposable furniture.  This weekend however, was different.  I needed a stand for my keyboard (a newly found hobby of mine).  However, I couldn't find one that fit my keyboard.  Yeah, I could've resorted to one like this that they sell at Amazon and hope it wouldn't fall apart.


But  that one is $89 dollars plus tax and who knows what it is made of or if my keyboard will even fit.  Then I found this online.


It was perfect (well almost).  See my keyboard doesn't have a lip that the side could slip into.  So that meant it would need a top.  He made the above one out of two shelves from Ikea and some added wood, for only $26 dollars.  I thought I could get even cheaper if I did the whole thing DIY.
Here is what I came up with.


I cut 2 matching sides out of 1 x 12 and a 1 x 4 support beam.  Then added the 1 x 12 top, screwed it all together and gave it a quick coat of stain.   Viola!  It was super easy and fits my keyboard perfectly.  


xoxo.

mONICa