Showing posts with label Etsy. Show all posts

Sunday, July 17, 2011

Hand Painted Nightstands

Instead of working on projects all weekend.  I've been listing furniture on Craigslist and packing boxes.  Moving is never fun, especially if you are talking a 2200 mile move.  The bad news is that instead of making new things, I'm getting rid of things, which means I won't have any new projects until the end of August.


Luckily, my partner in crime, Elaine has stepped up to the plate.  She's got some pretty awesome projects she's been working on.  For those of you who don't know.  I moved to Cincinnati, OH 2 years ago for hubby's job, but am originally from Pasadena, CA.  We now have the opportunity to go back and Elaine and I can reunite.  So in the next few months you'll see some changes (good ones), some revamping, and a lot more projects from Elaine.


Here are some really cool night stands that she painted in a green and then hand painted the branch design.  Aren't they cool, organic, and fun?


Green nightstands


organic night stand


painted branches


We are having a link party every Sunday, we are working on spreading the word.  If you'have a DIY project, Please click here to share.


xo,


mONICa


Participating in the following link parties:


Click here for full list.


Becolorful


Todays Creative Blog


Beyond The Picket Fence

Saturday, July 16, 2011

Showoff Sunday's #5

I'm really working hard spreading the word about our showoff party.  I would highly appreciate it if you could help us spread the word.  A quick tweet or facebook post would be great.  I'd love to see lots to lots of projects to help inspire all of us.

Here's a cute buffet from last weeks Showoff party @ making it homeyPainted art deco buffetNow Lets Party!


Welcome to Show off Sundays. This is where you can post Home Decor projects you've been working on this week. You are welcome to post Etsy listing as long as the photos are from a blog post and not just an Etsy URL. I know the things you sell on Etsy or other sites still take creativity and work so I don't mind if you post them. Anything furniture or decorating related is welcome. If you already know the link party drill, feel free to scroll on down and link away! If you’ve never linked up to a link party before, here’s how it works…

1. Scroll down this page until you see the “add your link” button. Click it, and create a super-descriptive name for your link. Something like, “DIY Floral Rug”, or “Hot Pink Dresser”. That’ll make it easier for folks to browse through all the links.


2. Make sure you link directly to the  Project post you’d like to share- not to the main page of your blog


 3. Please grab this button and stick it at the end of your project post on your blog and/or in your links/ parties section. Just copy and paste the code in the box below into the html part of your post, and voila!


4. Last but not least, we love new followers.  To keep up with what we have going on in the ideas world please subscribe to our blog.


Decorating Insanity

<div align="center"><a href="http://www.decoratinginsanity.com" title="Decorating Insanity"><img src="http://decorinsanity.files.wordpress.com/2011/06/di-showoff-sundays.jpg?w=150" alt="Decorating Insanity" style="border:none;" /></a></div>


xo,

mONICa

Thursday, June 23, 2011

Customized Corkboards- Guest Post

feaTuRe fRiDayS

Carolyn at Customized Living make these amazing corkboards.  Today, she is visiting our blog to tell us a little more about them:

When you think about a corkboard, the word "art" is probably not the first thing that comes to mind.  Maybe you're envisioning a classroom bulletin board or a sterile office cubicle.  


I'm writing this to change your mind.  I make framed corkboards and decorative push pins.  They can be customized for any decor and used for multiple purposes in any room of your home.  I make them so that the framed fabric is pretty enough to stand alone as art, adding color to your room.  Here are 5 suggestions on where and how you can incorporate a corkboard to meet your needs.


1. Master bedroom or bathroom:  Take your jewelry out of its box and display it where you can enjoy it.  Start with a frame that fits your decor.  You have endless fabric options, but for jewelry, I like starting with pure white.  It really makes jewelry pop.

Once you've found the perfect frame and fabric, pin on your jewelry.  It will turn it into a whole new type of art.  


2. Your child's room:  Large corkboards are great in kids' bedrooms or playrooms, because you can proudly display their artwork.  Or display favorite photos.  My kids love being able to choose photos to hang in their rooms.  Easily change them out, and use decorative push pins to make your display even more unique. 


3.  A family room or living room:  Display photos without the glare of glass.  Many fabrics showcase black and white photography beautifully.


4. Office (home or business):  Post calendars, to-do lists, and reminders. With the right corkboard and decorative push pins, the most common objects become instant art.  This corkboard is particularly versatile, because it suits a man's or woman's space equally well.


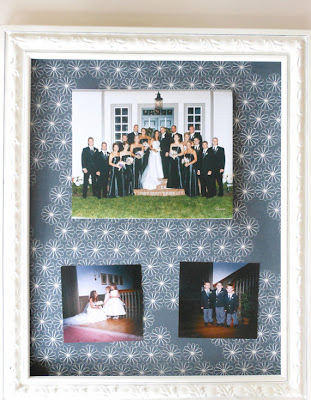
5.  A gift:  There are many reasons to give a corkboard as a gift.  A new baby, a recent graduate, a boss or co-worker.  This summer, consider a corkboard as a gift for newlyweds.  They'll love the unique way to display their favorite wedding photos.


The final touch?  Push pins.  Why settle for thumb tacks, when you can have these?  I repurpose vintage jewelry and create push pins that truly customize your display.


Visit my Etsy shop, CMB Display Designs, to find the right corkboard and push pins for you.  I also sell vintage accessories and housewares.  Surround yourself with things you love in your home.  


You can also find me and my interior designs and fashion ideas on my blog: www.customizedliving.blogspot.com.


Thank you Carolyn for visiting.


xo,

mONICa


Tuesday, June 21, 2011

Feeling French?

WILD CARD WEDNESDAYS

I love Paris Apartment Decor.  It's very romantic and chic.


Furniture and accessories have time-worn elegance and a vintage look. Chairs, tables, and armoires painted in black or cream bear golden accents. They blend beautifully with dark, carved wood. Rich, shimmering silks and luxurious brocades and velvets enhance upscale interiors. (Read more here).

Here are some great Paris Apartment Etsy FindsParis Apartment Aqua Mirror


Sunday, June 12, 2011

Blue Side Table

We are back.  All technical difficulties have been resolved.


Here's a cute little table that we put in our shop this week and a little DIY instruction to go with it.  We've named it the Caribbean Blue Side Table.


First, I sanded and used a flexible sand sponge for the rounded parts of the table.

Then I removed dust with a little paint thinner and a rag, primed and allowed to cure.


I love sanding blocks


Then I painted. A couple of coats of spray paint did the trick.  A couple of coats of polyurethane sealed the deal.

 For the drawer I decided to use a  fabric liner:

First I made paper template for all sides...numbering front sides.

e.

Paper templates


Then I cut out  the fabric.


I spread on regular matte mod podge..one side at a time


modge podge

I layed my fabric down and smoothed out any bubbles...one side at a time.

modge podge drawer liner

After a couple of hours I laid on a top coat of mod podge, let it dry and laid on to more coats.


Last but not least I laid on a couple of layers of polyurethane, this will keep the modge podge from ever feeling tacky, even in hot weather.

xo,

eLAINe


Saturday, June 4, 2011

3 Drawer Dresser Transformation

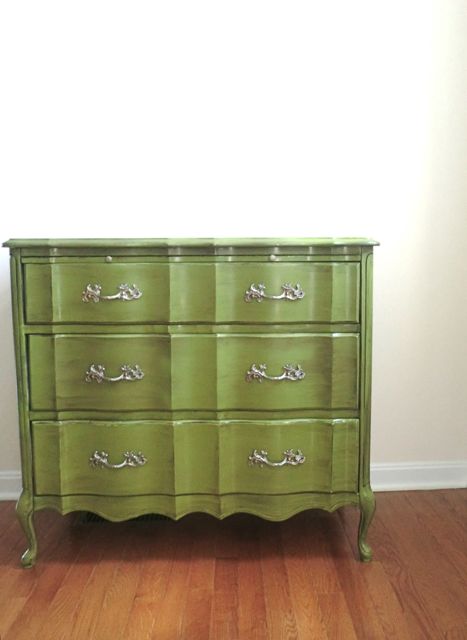
Here is a project I worked on this week


3 drawer French Provincial Dresser


Before


green french provincial dresserAfter


I think it would not only make a great dresser, but a great small dining buffet, entry way table, or nightstand.


xo,


mONICa


Tuesday, May 31, 2011

Before and After- The Imagination Desk

I thought I"d post some quick pics of a desk I just finished.  I thought this desk was really cool and would make a neat table for kids to draw on, or as a wrapping station in a craft room.

It had some gouges, so I did some filling in with wood filler and sanded, primed, painted, and clear coated in gloss.  I think it came out great.  It's a fun piece for any room.

I've named it the Imagination Desk, first of all because it's a drawing table that kids can use their imagination.  Secondly, because there are so many uses for it, you have to use your imagination to find a purpose for it.

Art table before


Art Table before


Turquoise art tableArt Table After


xo,


mONICa


Sunday, May 29, 2011

It's been a crazy week

I have been so busy lately.  I just launched a new Etsy shop called Decorating Insanity.  My garage looks an artist studio with my multiple half done projects that are starting to look fantastic.  I dream of greatness with a real studio one day in Los Angeles (lately I've been wanting to go back home pretty badly)  and I must get more things in my store and fast.  It's looking a little half naked right now.

I sold my first piece within days and that was really exciting.


I've completed my second piece this week and listed it, and I have at least 2 more pieces on the way this week.


Since it's spray painting season I've got to take advantage of the weather.  I thought I'd post some great spray painting tips from Thrifty Decor Chick.


Q:  Where do you spray paint in the different seasons?

A:  In the spring/summer/fall that’s easy – usually in the backyard or on the deck. Usually I can be found holding an item out at arm’s length, over the edge of the deck, spraying away. Then I’ll just lay it on the railing to dry.

I keep old sheets around that I use as drop clothes when I paint, but most often I use them on the garage floor to spray paint. A few many, many times hubby has come home to a slew of items drying on his side of the garage floor. Which I know thrills him to no end.  ;)

In the winter, I have been known to spray paint in the basement – but I do quick, light sprays, then leave immediately. Usually anymore, I do my winter painting in the garage.

Q:  Do I need to prep my surfaces for spray paint?

A:  Other than thoroughly cleaning an item, honestly I don’t prep much. :) If it’s bare wood, a spray primer is a really good idea. You’ll prime the surface and use way less spray paint in the end.

On wood items, sometimes I will do a light sanding to prepare the surface – but most of the time I don’t. On metal, I usually just spray directly on the surface, but if it’s something that will get a lot of handling, I definitely prime it first. I have sprayed many metal lamps and did not prime because (the bases) don’t get touched much.

Same goes for light fixtures – I mean, how often do you touch them? At least around here, it’s not much. :)

So for the kitchen fixture, I didn’t prime. I did light, quick sprays and worked my way around the light as it hung. I LOVE the way it turned out!:

Swoon! (Ignore the pantry door in front of the window!) Now the light hangs about 29 inches above the table instead of 31 (I know, but I notice.) And it’s 23 inches wide instead of 18 inches – which fills in that area much better.

Visual substance and all.  ;)

I’m thinking of an update for the shades – you know I can’t leave well enough alone!

The Krylon oil rubbed bronze paint I used dried super fast, even out in the freaking-insane-I’m-sweating-just-standing-here-heat we had today, but you need to be sure to let anything you spray paint cure (dry) long enough before you handle it.

Because I’m insanely impatient, I waited till this fixture was dry to the touch and then started installing. Because of that, there were a few little scratches here and there after I got it up.

I just threw the sheet over the kitchen table and sprayed little touch ups. I don’t recommend doing this unless you really have yours spaces covered. But I am me and me is crayyyyzay! :)

So if your project doesn’t go just right, what do you do?

Q:  How do I fix bubbles/crackling/drips/oopsies?

A: Imperfections usually mean one of two things – either you didn’t prep properly so the paint isn’t adhering well, or you are spraying too much, too fast. Drips always mean you’ve used too much. To correct those, wipe them off immediately if you can, then spray over. If you notice them later, sand it down lightly and spray again.

Same goes for crackling. Whenever I see that it means I haven’t prepped well. Sometimes I’ve noticed crackles when I’m using spray paint that has been in the heat or the item I’m spraying has been in the heat.

Crackle can be harder to cover – so sand down as much as possible and spray again.

If you follow these tips, you should get a finished product that will last you for years!:

xo,

mONICa

Friday, May 27, 2011

Feature Friday- Lamp Shade Designs

Last week I talked about making your own drum light chandelier, but what if you can't find the right size and what if you don't want to cover it yourself or can't find the right fabric?

There is a way to get a custom shade and it's called Lamp Shade Designs on Etsy.

Dana makes these lamp shades from scratch so you can get any size that you want.  This passionate business owner can make shades from 4" to 22" diameter( the perfect size for your drum chandelier).  Tall or short she can do it for you.

Dana lives in Norfolk, VA with her husband and 2 children(6 &8), she covered her first lamp shade when designing her daughters room and ever since then she has been hooked.

Here are some examples of her designs:

The PalaceLove this oneThis one is would have looked great in last weeks wonderful for less wednesdays post.


So what are some great things you can do with a custom drum lampshade.  Well for starters change the lampshade on a cool lamp.


or add a drum shade to a vintage lamp:


Hollywood Regency Lamp on Etsy


I sooo love this lamp.  Anyway it would look great with the right custom drum shade.


A drum chandelier is always a great option


Drum Chandeliers


and my favorite is to disguise an ugly ceiling fans (that's right I think ceiling fans are the ugliest thing ever!!!)  with a drum lamp shade.


So there you have it, great uses for lamp shades and now you know where you can get them CUSTOM.  Don't forget to visit Dana's Etsy Shop.


WE WILL BE HOSTING A LINK PARTY ON FRIDAY FOR ANY RECENT DIY PROJECTS.  COME BACK AND VISIT US!


xo,


mONICa

Wednesday, May 11, 2011

Eclectic Living Room

HGTV's Emily Henderson did this eclectic living room with a bold yet sophisticated sofa, rustic coffee table, and mid- century accent pieces.  I love the random mix of furnishings.


Emily Henderson's Blog


If you are looking to do a room like this I recommend to mix some vintage finds with some new pieces.  The beauty of this room is you can probably find most of these pieces used.  To start...find yourself a vintage sofa.  Something bright and colorful.  For example the sofa below sold on Ebay for $160.00


Then add some pillows this one from Amazon might be fun.


Here is a great chair from Urban Outfitters for $329


Here's a great barn wood coffee table that would be great stained darker to get Emily's look.  You can't beat it for $235.00


Here's an awesome lamp  for $89.00


and another cool lampHere's a great little mid century side table  for only $55.00


and a black rattan ottoman


With some sprucing up these could be great tables and for $50 bucks, not bad.


So there you have it.  My version of Emily Hendersons eclectic Living Room.  Hope you enjoyed.


xo,


mONICa