Showing posts with label guest post. Show all posts

Monday, March 26, 2012

Guest Post: Kimberly from See Sew and Seedlings


First of all, I am so excited to be here today at Decorating Insanity!!  This is such an awesome blog with tons of great ideas, so it is my pleasure to be here.


I've been seeing these adorable whimsical frames everywhere but they have all been a little too pricey for me.....  Needless to say, when I found Cut It Out Already Frames I was beyond excited!!  Not only are the shapes to die for the prices are so reasonable.  Their customer service is great.  The frames come unfinished and the instructions say to use acrylic paint, which is exactly what I did.  Once I painted on 2 coats, I allowed the paint to fully dry then took sandpaper and sanded all the edges including the inside where the picture shows through.  I purchased a variety of sizes, 4x6, 5x7, and 16x20. 


The other pictures (the ones with no frames) were purchased from I Print Canvas however they are not canvas.  I chose the 3/16 Gator Board Mounting.  I absolutely love these all mixed together!!  They make my walls and once again the customer service was great!


For my 16x20 I found the cutest poster from Zazzle - Signs By Andrea.  The quality is great and it looks so awesome combined with this frame! 


If you want a quick way to transform your walls I definitely recommend!

Thanks again to Monica and Elaine for having me here today!!

Thank you Kimberly for visiting us.  What a great wall transformation.  If you love this project check out the other awesome projects she has done by visiting her blog See Sew and Seedlings.

xo,

mONICa

Monday, March 19, 2012

Guest Post: Karen from Redoux on Dumpster Diving

Hey there, or should I say "Bonjour"!  I'm Karen from Redoux and I am bonafied francophile, junker who happens to speak fluent Franglaise!

The talented minds behind Decorating Insanity (blog title so appropriately applied to moi) were so gracious to have me guest post today.  One thing, I LOVE Dumpsters!  I spend so much time peering into them, that I have developed some handy tips on scoring the best junk, with the least amount of effort.  So, without further adieu......
 
Le Comprehensive Guide to Dumpster Diving, Part "Un"

I love to restore and refurbish furniture.  If I am lucky enough, even use pieces I find on the side of the road, Craig's list Free, or my favorite....DUMPSTERS! 

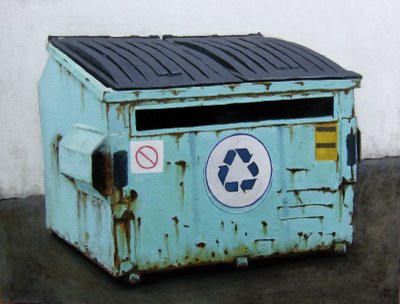
In fact, I recently became a certified member of this club:

Dumpsters, my friends are not just repositories for stinky garbage and dirty diapers.  They are treasure troves of Architectural Elements, trim, cool moulding, old boards.  They are often the secret place people go to get rid of broken chairs, ugly old mirrors, Oil Paintings by Aunt Bertha, and any number of salvageable furniture items that may have a scratch, dent, or just be plain ugly.  These items end up in various dumpsters because of one reason.  People are lazy and don't want to haul their stuff to the dump and pay the fee.  

There are always friendly workers at my local dump.

What is a cheater's misdeeds can be your gain if you follow these simple rules:
In order to yield the best results from a dumpster dive, you need to keep these rules in mind.
  1.  Bring work gloves and a flashlight.  You might have to dig around a bit for something good, and you don't know what you might encounter in the process.  (sidebar, I have NEVER encountered a live animal, i.e. Mouse or Rat)


 2.  Wear old clothes, this goes without saying.
 (overalls are my personal favorite)

3. Go in the early morning hours, before the garbage trucks come and people start arriving at work for the day.  It is slightly embarrassing to explain to people that the nice looking mom in the van is diving for garbage.
 My dream to dumpster dive here someday....

4. Bring a large vehicle.  My van has seats that fold and stow, and it doubles as a pick up truck.  You don't want to discover an amazing collection of chairs, only to realize they won't fit in your economy sized car.
(not my actual car, mine is far yukkier)
***If you don't know where to begin a good dumpster dive, here are some suggestions.  Take a tour around your city.  Stick to the Mom and Pop type stores, independent furniture stores, flooring stores, etc.  Don't bother looking behind strip malls.    Dumpsters here are always locked and most stores have industrial sized trash compactors that immediately destroy any goods you would hope to score.  

 5. Look for smaller groupings of businesses that are not necessarily on busy roads.  These dumpsters are not locked.  This is where people will go to throw out their almost perfectly good items.   If there is an unlocked dumpster in your town, and it is in a secluded area, trust me, the trash rule breakers know about it and put their goods there.  Often, the good stuff is not just in the dumpster, it is often behind, and next to the dumpster.

5.When running your daily errands, scan the roads, esp. residential neighborhoods for "reno" dumpsters.  I have even trained my children to keep their eyes open for these.  Reno dumpsters are gold mines for Architectural Salvaged pieces, old doors, cool mouldings and trims.  And, if you are lucky,  furniture!   I always try to find the owner of the dumpster first before beginning my raid.  Just to be on the safe side. 


7. Once you have made your plans and pinpointed your dumpster locations, head out early.  If you live in a city, I recommend you go with a friend.  I live in a small city with a low crime rate.  I feel comfortable diving on my own.  However, I once encountered a man in a dumpster.  I pulled up to a dumpster and heard noises.  I paused in my car for a moment, and lo and behold a man popped out and waved at me.  When coming upon a dumpster in the dark, I highly recommend giving a quick tap to your car horn to alert anyone that might be there of your presence.  I don't recommend joining them in the dump dive.  Just say a few angry words under your breath and come back in a few days. 


Stop by Redoux to check out the second installment of the junk series
Part Deux.
Dumpster Diving at Apartment Complexes. Everything you need to know, including how to get into gated complexes, (where the really good stuff is).  

Thank you so much Karen for sharing those great tips with us.  Does anyone else want to head out right this sec and go dumpster diving?  I do

xo,

mONICa

Monday, March 12, 2012

Guest Post: Martha from Leone Designs

Hello all...today we have Martha from Leone Designs sharing with us some of her ideas for two tone furniture.  Take it away, Martha!!

What inspires me and causes my brain to swell with ideas? The elements of design; line, shape, value, color, space, and texture. To keep track of the influx of possibilities, I keep a small sketch book and combine thoughts and ideas to (hopefully) come up with unexpected fresh ideas. I don't know what I would do without my sketch book!


Lately, I've been working with a two-toned color scheme of white and a second color. I look at furniture as a blank canvas and divide each piece into zones (or shapes) that promote a sense of the unexpected. Then I consider how for example, shape and space can relate to one another to produce a balanced appealing design. That's how the two-toned red and white chair was born.


This yellow and white mid-century piece seemed to be asking for a clean application of two colors to reflect its character. But for a small element of surprise, I painted the sides of the dresser different from one another.


A confession: stripping paint is a nightmare for me. Honestly, I haven't figured out how to do it with much success. To avoid it altogether, I layer my desired colors on top and distress them to reveal previous paint jobs. That technique, combined with the two-tone look makes for exciting colorful pieces with lots of texture. Here are a few examples of that look:

Black, white, and red chair: Painted Behr California Poppy, ASCP Old White, then sanded to reveal the red.


Red dresser: Painted dark red, washed with Behr California Poppy, ASCP Provence, ASCP Old White, then distressed.


Black and white kitchen table: Painted Benjamin Moore black, ASCP Old White, then distressed.


And sometimes, it's just good to leave portions of a piece alone and use paint to accentuate the beauty of the wood. This piece needed that treatment.


These days, I'm kind of obsessed with the two-toned look of white + another color, but if we take a look at the color wheel and start pairing up colors that are analogous or opposite each other on that wheel, we'll discover that two-toned combinations are endless. Let's get busy combining colors!

Thanks you so much Martha for sharing with us such great ideas.  Don't forget to visit her blog for some more great inspirations.

xo,

mONICa

Monday, February 27, 2012

Guest Post: Pam from Be Colorful

To begin I want to say thank you to Decorating Insanity for having the confidence to ask me to guest blog for them.  Having such a diverse and progressive blog extend me this invitation is a huge compliment. 

Floral coffee table

So who am I? I am a blogger, functional artist, and frustrated decorator from a mid- sized town in a fly-over state. I sometimes wish I lived in a more metropolitan area where my less than conventional style wasn't so out of the ordinary. I have always loved color and when I wasn't able to find some of the pieces here locally that I was looking for to use in our own home I did the next best thing and created them myself.
Painted furniture is ubiquitous these days but what sets my style apart from most are the multiple patterns and colorful palates that I usually incorporate into my work.

Patterns
I have been in the gathering inspiration stage lately and haven't done a lot of painting. As I peruse the internet and design magazines I am noticing that I am attracted to simpler lines and geometric patterns. I am thinking that is the direction I want to go now with my own painting style too.  
From the beginning I have been influenced by the designs of Sticks, Susan Sargent, MacKenzie Childs, and Kim Parker. They all use a lot of florals, words or quotes, and some version of a stripe (usually black and white).
This is an earlier piece of mine that incorporated all of those elements.
Jackie's table

Sometimes it is an idea that just presents its self and gives a piece that little extra edge and whimsy that makes me like it more. I had seen where a number of furniture painters were painting the insides of their drawers and I liked that more finished look. Then one day I thought it would be fun if the drawer held a bit of a surprise when it was opened. So I added these words.
Jackies table drawer

This credenza that I painted two years ago for my studio was heavily influenced by the more stylistic flower designs of Kim Parker. I had recently finished reading one of her design books and I was drawn to her over-sized florals and soft colors.
My credenza
This beverage cart is another example of her influence on my work.

   Beverage cart

Bev cart handle


The nod to Mac Kenzie Childs is apparent in this buffet that I painted  for our dining room and then recently sold. Her patterns lean a bit more to the traditional and her pieces often have an element of gold or gilding to them that makes them a bit more formal. It is the mixed patterns that makes them such conversational and perhaps controversial pieces. As for me, I think a single statement like this can absolutely make a room.  When I look at this buffet I am beginning to see the geometric influence  already creeping into my work. Those two quatrefoil patterned drawers are representative of the look I am obsessed with now.
Occasionally I work to edit myself and dial back on the number of colors and patterns to create something that is more compatible to most spaces and varying styles. Since I usually work with strong vibrant colors it was a stretch for me to limit myself to only two colors like I did here but this was one of those pieces that ultimately just came together so easily that I may try this technique again. 

Sherrie's piece 2

Recently I have been reading the book
In the Pink - Dorothy Draper
In the pink
Now it is her compelling style that is driving my design direction.
What appeals to me is her sense of drama. 
The bold curves,
Bod curves
the sharp contrast of black and white,
Dorothy style via the peak of chic
and her use of geometic and floral patterns.
Geometric
Draper pattern
I was beginning to see a bit of her effect on my style when I painted this garden table in 2011.
  Pink table
I don't plan on leaving my colorful mixed pattern style far behind and I am not a huge fan of chnitz but I look forward to trying my hand at a cleaner more dramatic Hollywood Regency look. I will call this my HR Period. 
;D
This will be the next piece I work on because I think this buffet lends itself well to this style. Please don't hate me for painting something from this era. I have had this vintage piece in my home for over twenty years. It has served its purpose well but I'm over it and ready to move on.  I see it in a dramatic black and white. 
IMG_4758
This is my inspiration photo.
Blak and wht
Tobi Fairley

I will set myself a goal - to have this buffet painted and ready to go by April 1st. Let's see if I can follow through. 
Thanks for stopping by and thank you again to the women of Decorating Insanity for this opportunity.
xoxo,
p

Thanks Pam for joining us.  Isn't her stuff so fun and whimsical?  Everyone has to have a little fun color in their life.  Visit Be Colorful for more fun projects.

xo,

mONICa

Thursday, June 23, 2011

Customized Corkboards- Guest Post

feaTuRe fRiDayS

Carolyn at Customized Living make these amazing corkboards.  Today, she is visiting our blog to tell us a little more about them:

When you think about a corkboard, the word "art" is probably not the first thing that comes to mind.  Maybe you're envisioning a classroom bulletin board or a sterile office cubicle.  


I'm writing this to change your mind.  I make framed corkboards and decorative push pins.  They can be customized for any decor and used for multiple purposes in any room of your home.  I make them so that the framed fabric is pretty enough to stand alone as art, adding color to your room.  Here are 5 suggestions on where and how you can incorporate a corkboard to meet your needs.


1. Master bedroom or bathroom:  Take your jewelry out of its box and display it where you can enjoy it.  Start with a frame that fits your decor.  You have endless fabric options, but for jewelry, I like starting with pure white.  It really makes jewelry pop.

Once you've found the perfect frame and fabric, pin on your jewelry.  It will turn it into a whole new type of art.  


2. Your child's room:  Large corkboards are great in kids' bedrooms or playrooms, because you can proudly display their artwork.  Or display favorite photos.  My kids love being able to choose photos to hang in their rooms.  Easily change them out, and use decorative push pins to make your display even more unique. 


3.  A family room or living room:  Display photos without the glare of glass.  Many fabrics showcase black and white photography beautifully.


4. Office (home or business):  Post calendars, to-do lists, and reminders. With the right corkboard and decorative push pins, the most common objects become instant art.  This corkboard is particularly versatile, because it suits a man's or woman's space equally well.


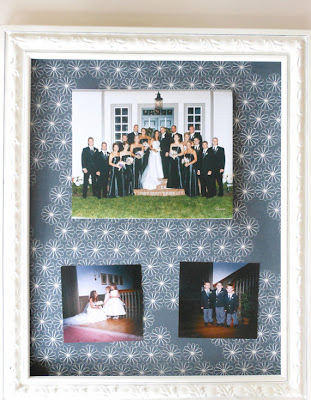
5.  A gift:  There are many reasons to give a corkboard as a gift.  A new baby, a recent graduate, a boss or co-worker.  This summer, consider a corkboard as a gift for newlyweds.  They'll love the unique way to display their favorite wedding photos.


The final touch?  Push pins.  Why settle for thumb tacks, when you can have these?  I repurpose vintage jewelry and create push pins that truly customize your display.


Visit my Etsy shop, CMB Display Designs, to find the right corkboard and push pins for you.  I also sell vintage accessories and housewares.  Surround yourself with things you love in your home.  


You can also find me and my interior designs and fashion ideas on my blog: www.customizedliving.blogspot.com.


Thank you Carolyn for visiting.


xo,

mONICa