Monday, March 19, 2012

Guest Post: Karen from Redoux on Dumpster Diving

Hey there, or should I say "Bonjour"!  I'm Karen from Redoux and I am bonafied francophile, junker who happens to speak fluent Franglaise!

The talented minds behind Decorating Insanity (blog title so appropriately applied to moi) were so gracious to have me guest post today.  One thing, I LOVE Dumpsters!  I spend so much time peering into them, that I have developed some handy tips on scoring the best junk, with the least amount of effort.  So, without further adieu......
 
Le Comprehensive Guide to Dumpster Diving, Part "Un"

I love to restore and refurbish furniture.  If I am lucky enough, even use pieces I find on the side of the road, Craig's list Free, or my favorite....DUMPSTERS! 
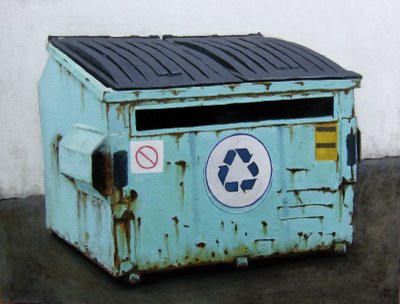
In fact, I recently became a certified member of this club:

Dumpsters, my friends are not just repositories for stinky garbage and dirty diapers.  They are treasure troves of Architectural Elements, trim, cool moulding, old boards.  They are often the secret place people go to get rid of broken chairs, ugly old mirrors, Oil Paintings by Aunt Bertha, and any number of salvageable furniture items that may have a scratch, dent, or just be plain ugly.  These items end up in various dumpsters because of one reason.  People are lazy and don't want to haul their stuff to the dump and pay the fee.  

There are always friendly workers at my local dump.

What is a cheater's misdeeds can be your gain if you follow these simple rules:
In order to yield the best results from a dumpster dive, you need to keep these rules in mind.
  1.  Bring work gloves and a flashlight.  You might have to dig around a bit for something good, and you don't know what you might encounter in the process.  (sidebar, I have NEVER encountered a live animal, i.e. Mouse or Rat)


 2.  Wear old clothes, this goes without saying.
 (overalls are my personal favorite)

3. Go in the early morning hours, before the garbage trucks come and people start arriving at work for the day.  It is slightly embarrassing to explain to people that the nice looking mom in the van is diving for garbage.
 My dream to dumpster dive here someday....

4. Bring a large vehicle.  My van has seats that fold and stow, and it doubles as a pick up truck.  You don't want to discover an amazing collection of chairs, only to realize they won't fit in your economy sized car.
(not my actual car, mine is far yukkier)
***If you don't know where to begin a good dumpster dive, here are some suggestions.  Take a tour around your city.  Stick to the Mom and Pop type stores, independent furniture stores, flooring stores, etc.  Don't bother looking behind strip malls.    Dumpsters here are always locked and most stores have industrial sized trash compactors that immediately destroy any goods you would hope to score.  

 5. Look for smaller groupings of businesses that are not necessarily on busy roads.  These dumpsters are not locked.  This is where people will go to throw out their almost perfectly good items.   If there is an unlocked dumpster in your town, and it is in a secluded area, trust me, the trash rule breakers know about it and put their goods there.  Often, the good stuff is not just in the dumpster, it is often behind, and next to the dumpster.

5.When running your daily errands, scan the roads, esp. residential neighborhoods for "reno" dumpsters.  I have even trained my children to keep their eyes open for these.  Reno dumpsters are gold mines for Architectural Salvaged pieces, old doors, cool mouldings and trims.  And, if you are lucky,  furniture!   I always try to find the owner of the dumpster first before beginning my raid.  Just to be on the safe side. 


7. Once you have made your plans and pinpointed your dumpster locations, head out early.  If you live in a city, I recommend you go with a friend.  I live in a small city with a low crime rate.  I feel comfortable diving on my own.  However, I once encountered a man in a dumpster.  I pulled up to a dumpster and heard noises.  I paused in my car for a moment, and lo and behold a man popped out and waved at me.  When coming upon a dumpster in the dark, I highly recommend giving a quick tap to your car horn to alert anyone that might be there of your presence.  I don't recommend joining them in the dump dive.  Just say a few angry words under your breath and come back in a few days. 


Stop by Redoux to check out the second installment of the junk series
Part Deux.
Dumpster Diving at Apartment Complexes. Everything you need to know, including how to get into gated complexes, (where the really good stuff is).  

Thank you so much Karen for sharing those great tips with us.  Does anyone else want to head out right this sec and go dumpster diving?  I do

xo,

mONICa

Friday, March 16, 2012

Weekend Features #9

Thanks again to all who linked up last week. We had some wonderful projects. Here are some of the favs.


Here is a great dresser turned into a bench and painted a wonderful shade of blue.

This dresser looks amazing with its double stripes.

and this beautiful cabinet painted in Weathervane

If you have been featured don't forget to grab a "My Name In Lights" Button.  See you all next week for Furniture Friday.

Decorating Insanity
<div align="center"><a href="http://decoratinginsanity.blogspot.com" title="Decorating Insanity"><img src="https://blogger.googleusercontent.com/img/b/R29vZ2xl/AVvXsEgOl8CGo8Swbr8fgvMV6STJPJb3kNsygHpbhe6UMDcG-UBUOAcf-FGu-XEzmrU815-ixPb3upuY6vNWpwou1o41ndrbzIycTSCKtYNJj5q4_w1G_5qXsh0iFi2Ov9XSwU5h-7AgWgkTKCs/s1600/featured+button+220.jpg" alt="Decorating Insanity" style="border:none;" /></a></div>

xo,

mONICa

Thursday, March 15, 2012

Furniture Friday #9 and Link Party

Happy Friday peeps!!  How has your week been?  I've had mom brain or something all week.  I actually had a moment where I threw my families food from the drive-thru (In-n-out burger) in the trash.  Luckily I realized it before it was too cold and applied the 5 second (OK 5 minute) rule to it since it stayed in the bag and hopefully didn't get germies in it.  I think I bit off more than I can chew this week and my brain could not focus.  

The good news is that I was able to get a custom piece finished.  It's the same dresser that was featured at Furniture Friday #7, except our client asked us to paint it again, so we did.  

It started as this
Then went to this
and now it looks like this
We ended up getting a custom order from a dresser we had painted already which is awesome.

Now lets party!!

Thank you to all who linked up last week, it always makes me feel so loved when I get y'all to visit my blog.  I feel inspired from all of your projects.

Please put your permalink into the linky and pretty please link back here so we can share everyone's other great ideas (button at the bottom of this post or on my sidebar).   Please do not link any shops!!  Sit back, relax, grab a martini, network (visit other links) and enjoy the  party.

Note: By adding your link you are giving me permission to use your photos on my blog without contacting you.  Which means you may get featured.  

Ok.  Lets see what you got.

PS. Forgive me for any errors in this post, I'm serious there is something wrong with my brain this week.

xo,

mONICa


As you can see we're partying all week long. I probably need to go to link party rehab.  Oh well,  grab a martini and join us....Monica

Sunday

Monday

Tuesday

Wednesday

Thursday

Friday

Saturday

Wednesday, March 14, 2012

Faux Barnwood Desk

Have you ever wonder how to get the look of faux barn wood?  Well it takes layers and layers and layers of paint, but when it is done it is a fun look.

The fun part is you can use oops paint, spare colors from your house, or craft paint to get this look to work.  I usually start with a gray-blue, the next layer is a cream color.  Then I venture into the browns and grays.  You just keep layering paint colors until you get the look you want.  Sound time consuming?  It is, but the results are well worth it.  What does it look like?


I added a contrasting color and some fun paper for a bit of whimsy.

Have you ever tried faux barn wood?

xo,

mONICa

Monday, March 12, 2012

Guest Post: Martha from Leone Designs

Hello all...today we have Martha from Leone Designs sharing with us some of her ideas for two tone furniture.  Take it away, Martha!!

What inspires me and causes my brain to swell with ideas? The elements of design; line, shape, value, color, space, and texture. To keep track of the influx of possibilities, I keep a small sketch book and combine thoughts and ideas to (hopefully) come up with unexpected fresh ideas. I don't know what I would do without my sketch book!


Lately, I've been working with a two-toned color scheme of white and a second color. I look at furniture as a blank canvas and divide each piece into zones (or shapes) that promote a sense of the unexpected. Then I consider how for example, shape and space can relate to one another to produce a balanced appealing design. That's how the two-toned red and white chair was born.


This yellow and white mid-century piece seemed to be asking for a clean application of two colors to reflect its character. But for a small element of surprise, I painted the sides of the dresser different from one another.


A confession: stripping paint is a nightmare for me. Honestly, I haven't figured out how to do it with much success. To avoid it altogether, I layer my desired colors on top and distress them to reveal previous paint jobs. That technique, combined with the two-tone look makes for exciting colorful pieces with lots of texture. Here are a few examples of that look:

Black, white, and red chair: Painted Behr California Poppy, ASCP Old White, then sanded to reveal the red.


Red dresser: Painted dark red, washed with Behr California Poppy, ASCP Provence, ASCP Old White, then distressed.


Black and white kitchen table: Painted Benjamin Moore black, ASCP Old White, then distressed.


And sometimes, it's just good to leave portions of a piece alone and use paint to accentuate the beauty of the wood. This piece needed that treatment.


These days, I'm kind of obsessed with the two-toned look of white + another color, but if we take a look at the color wheel and start pairing up colors that are analogous or opposite each other on that wheel, we'll discover that two-toned combinations are endless. Let's get busy combining colors!

Thanks you so much Martha for sharing with us such great ideas.  Don't forget to visit her blog for some more great inspirations.

xo,

mONICa